Sign in to see ingredients
Create a free account to unlock this content
Don't have an account? Sign up free
Per serving
Calculating nutrition...
- 1
Make the shell batter
Whisk the egg with 1/4 cup of the sugar, the melted butter, 1/2 teaspoon vanilla, the lemon zest, and the almond extract until smooth. Stir the flour and baking powder together in a separate bowl, then work them into the egg mixture to make a smooth batter.
- 2
Press and shape the shells
Heat a pizzelle iron and cook the batter in small batches until golden, following your iron's directions. The moment you lift each pizzelle off the iron, roll it around a cannoli tube or the handle of a wooden spoon to form a shell, slide it off, and let it cool completely on a wire rack. Work quickly here, because the pizzelle stiffens as it cools and won't roll once it sets.
- 3
Cook the custard base
In a saucepan off the heat, whisk together the remaining 3/4 cup sugar and the cornstarch. Pour in the milk and stir until completely smooth. Set it over medium heat, bring to a boil, and stir constantly for about 2 minutes, until thick. Off the heat, stir in the remaining 1 teaspoon vanilla and, if you like a little warmth, a single drop of cinnamon oil. Let it cool completely.
- 4
Finish the filling and fill the shells
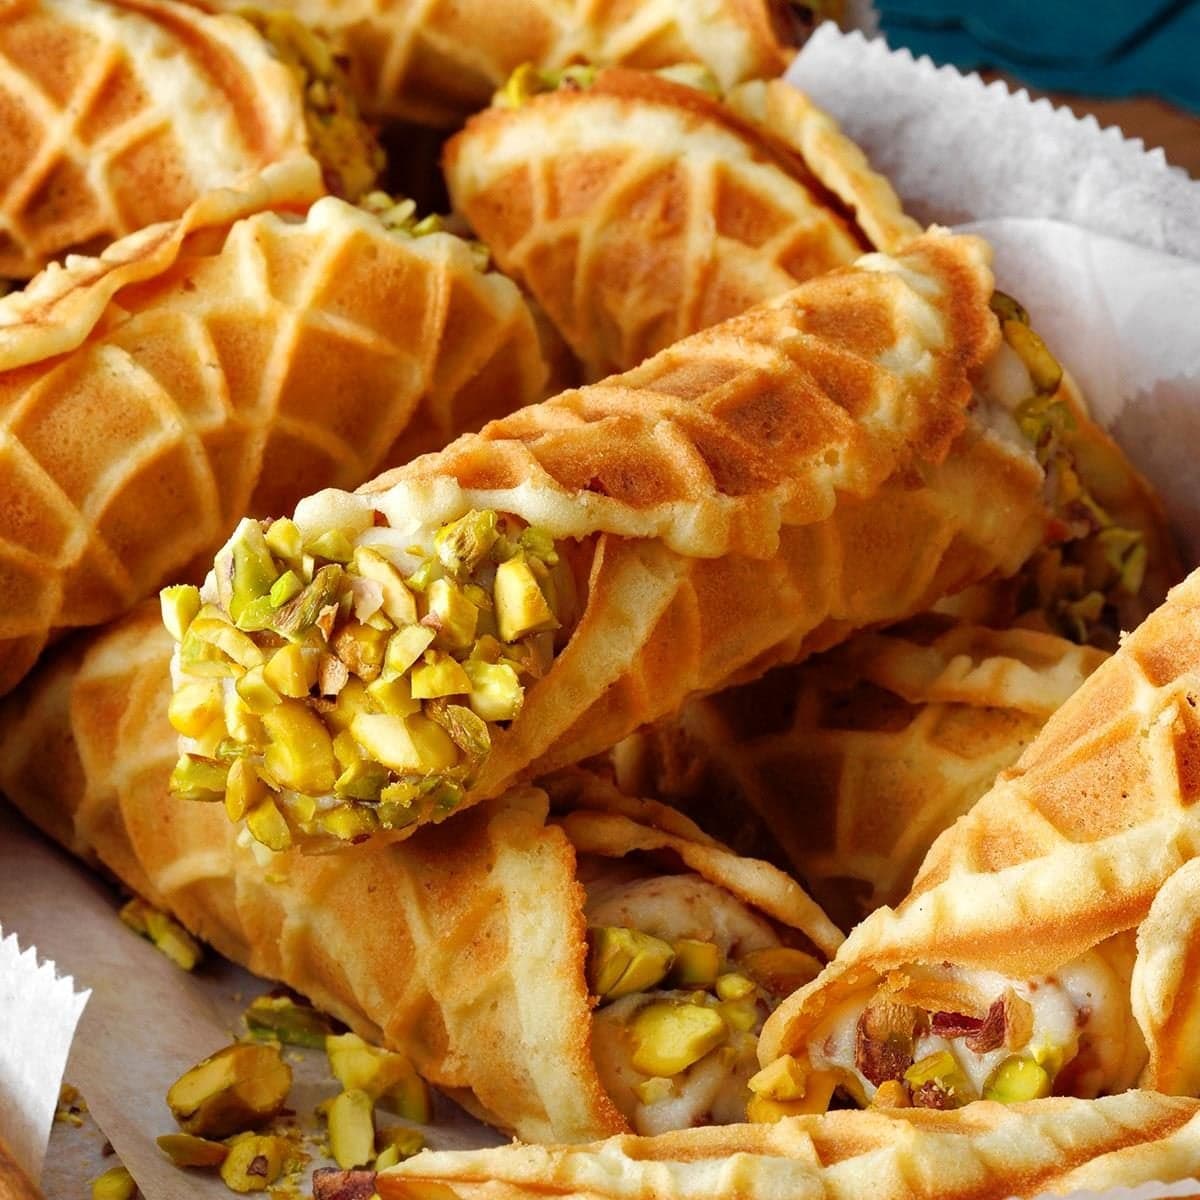
Beat the ricotta until it is smooth and creamy, then gradually beat in the cooled custard. Fold in the chopped chocolate. Pipe or spoon the filling into the shells from both ends, then dip each exposed end in the chopped pistachios. Fill them just before serving so the shells stay crisp.
Sign in to see all instructions
Create a free account to unlock this content
Don't have an account? Sign up free
Chocolate Cannoli
Created by: PastaAndProsciutto
Ingredients
- 1 egg
- 1 cup sugar
- 1/4 cup butter
- 1 1/2 tsp vanilla extract
- 1/4 tsp lemon zest
- 1/8 tsp almond extract
- 1/2 cup all-purpose flour
- 1/4 tsp baking powder
- 3 tbsp cornstarch
- 1 cup whole milk
- cinnamon oil
- 1 3/4 cup ricotta cheese
- 4 1/4 oz milk chocolate with almonds
- 1/2 cup pistachios
Instructions
- Make the shell batterWhisk the egg with 1/4 cup of the sugar, the melted butter, 1/2 teaspoon vanilla, the lemon zest, and the almond extract until smooth. Stir the flour and baking powder together in a separate bowl, then work them into the egg mixture to make a smooth batter.
- Press and shape the shellsHeat a pizzelle iron and cook the batter in small batches until golden, following your iron's directions. The moment you lift each pizzelle off the iron, roll it around a cannoli tube or the handle of a wooden spoon to form a shell, slide it off, and let it cool completely on a wire rack. Work quickly here, because the pizzelle stiffens as it cools and won't roll once it sets.
- Cook the custard baseIn a saucepan off the heat, whisk together the remaining 3/4 cup sugar and the cornstarch. Pour in the milk and stir until completely smooth. Set it over medium heat, bring to a boil, and stir constantly for about 2 minutes, until thick. Off the heat, stir in the remaining 1 teaspoon vanilla and, if you like a little warmth, a single drop of cinnamon oil. Let it cool completely.
- Finish the filling and fill the shellsBeat the ricotta until it is smooth and creamy, then gradually beat in the cooled custard. Fold in the chopped chocolate. Pipe or spoon the filling into the shells from both ends, then dip each exposed end in the chopped pistachios. Fill them just before serving so the shells stay crisp.