Authentic Ciabatta with Biga (and the Science of the Perfect Open Crumb)
Sign in to see ingredients
Create a free account to unlock this content
Don't have an account? Sign up free
Per serving
Calculating nutrition...
- 1
Make the biga (the night before)
In a medium bowl, combine 5 oz flour, 1/8 tsp rapid-rise yeast, and 4 oz room-temperature water. Stir until fully incorporated — it will look shaggy and thick. Cover tightly with plastic wrap and leave at room temperature for at least 8 hours, and up to 24. Overnight is perfect. This is your biga: a pre-ferment that builds flavor and gives the finished loaf that complex, slightly tangy depth you can't get by rushing straight to the main dough.
- 2
Build the dough
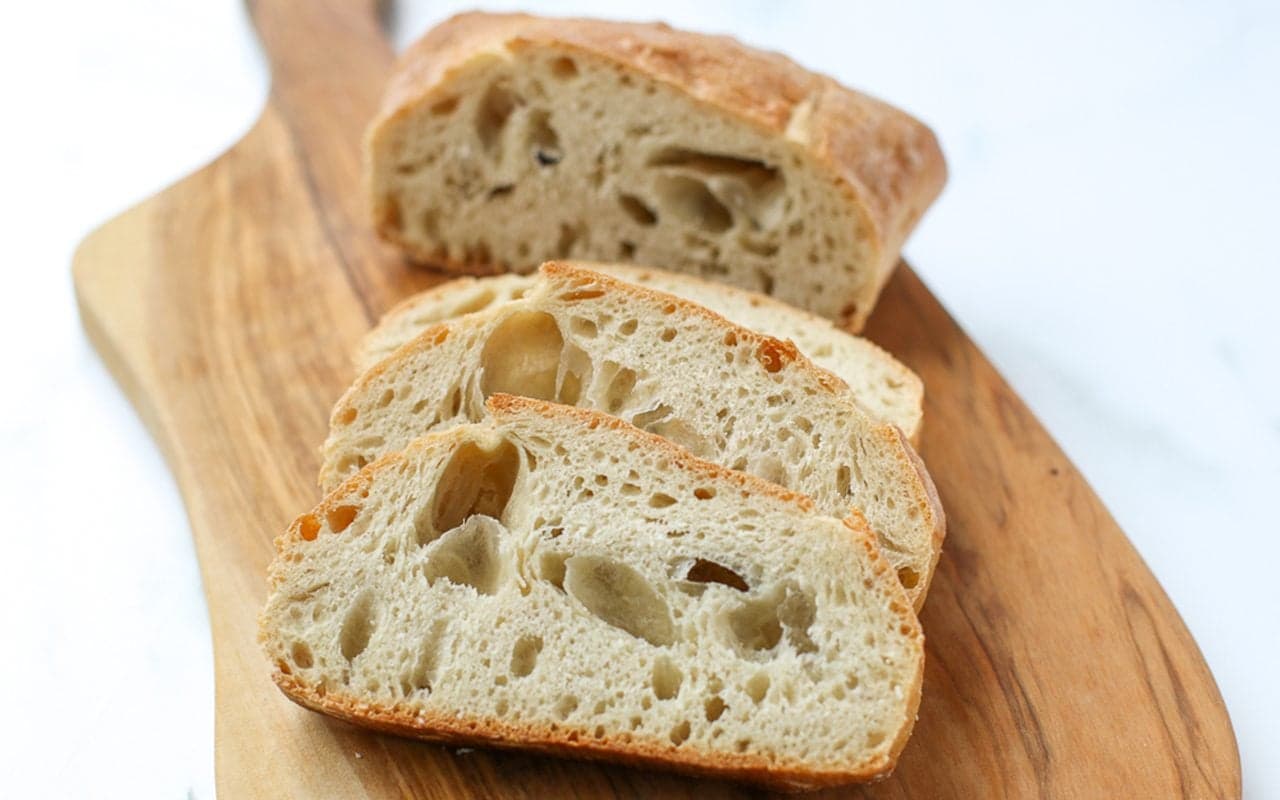
In the bowl of a stand mixer fitted with the paddle attachment, combine the biga with 10 oz flour, 1/2 tsp rapid-rise yeast, 1.5 tsp salt, 6 oz room-temperature water, and 2 oz room-temperature milk. Mix on the lowest speed until everything comes together, then continue mixing for 4-6 minutes until the dough pulls away from the sides of the bowl. Switch to the dough hook, increase speed to medium, and knead for 10 minutes. The dough will be shiny and very sticky — that's correct. High hydration (around 75%) is exactly what creates those signature big holes. Transfer to a large bowl and cover tightly with plastic wrap.
- 3
Bulk ferment and fold
Let the dough rise at room temperature until doubled, about 1 hour. Then do a series of stretch-and-folds: using lightly oiled fingers or a rubber spatula, grab one edge of the dough, lift it, and fold it toward the center. Rotate the bowl 90 degrees and repeat for a total of 8 folds. This builds strength without degassing — you're organizing gluten strands, not punching them down. Re-cover and let rest another 30 minutes.
- 4
Shape into loaves
Turn the dough onto a well-floured surface and cut in half. Flip each piece cut-side up and dust with flour. Gently press into a 12x6-inch rectangle, then fold the short ends toward the center with a slight overlap — you'll end up with a 7x4-inch rectangle. Cut two pieces of parchment to 12x6 inches and flour generously. Transfer each loaf to parchment, seam-side down, and dust the tops with flour. Cover loosely with plastic wrap and let rest at room temperature for 45 minutes to 1 hour. The dough should look puffy and relaxed.
- 5
Bake
Position an oven rack in the lower-middle position, place a pizza stone on it, and preheat the oven to 450 degrees F. Let it preheat for at least 30 minutes — the stone needs to be fully saturated with heat. Just before baking, set a baking sheet filled with hot water on the rack below the stone (this steam keeps the crust extensible in the first few minutes, letting the loaf spring up before it sets). Using a pizza peel or inverted baking sheet, gently stretch each loaf to about 10x6 inches by poking the surface with your fingers, then slide onto the hot stone. Bake 22-27 minutes until the crust is deep golden brown and the internal temperature hits 210 degrees F. Cool on a wire rack for at least 1 hour before cutting — cutting too early collapses the crumb structure you just spent all day building.
Sign in to see all instructions
Create a free account to unlock this content
Don't have an account? Sign up free
Authentic Ciabatta with Biga (and the Science of the Perfect Open Crumb)
Created by: TheBreadNerd
Ingredients
- 5 oz all-purpose flour
- 1/8 tsp rapid-rise yeast
- 4 oz water
- 10 oz all-purpose flour
- 1/2 tsp rapid-rise yeast
- 1 1/2 tsp table salt
- 6 oz water
- 2 oz milk
Instructions
- Make the biga (the night before)In a medium bowl, combine 5 oz flour, 1/8 tsp rapid-rise yeast, and 4 oz room-temperature water. Stir until fully incorporated — it will look shaggy and thick. Cover tightly with plastic wrap and leave at room temperature for at least 8 hours, and up to 24. Overnight is perfect. This is your biga: a pre-ferment that builds flavor and gives the finished loaf that complex, slightly tangy depth you can't get by rushing straight to the main dough.
- Build the doughIn the bowl of a stand mixer fitted with the paddle attachment, combine the biga with 10 oz flour, 1/2 tsp rapid-rise yeast, 1.5 tsp salt, 6 oz room-temperature water, and 2 oz room-temperature milk. Mix on the lowest speed until everything comes together, then continue mixing for 4-6 minutes until the dough pulls away from the sides of the bowl. Switch to the dough hook, increase speed to medium, and knead for 10 minutes. The dough will be shiny and very sticky — that's correct. High hydration (around 75%) is exactly what creates those signature big holes. Transfer to a large bowl and cover tightly with plastic wrap.
- Bulk ferment and foldLet the dough rise at room temperature until doubled, about 1 hour. Then do a series of stretch-and-folds: using lightly oiled fingers or a rubber spatula, grab one edge of the dough, lift it, and fold it toward the center. Rotate the bowl 90 degrees and repeat for a total of 8 folds. This builds strength without degassing — you're organizing gluten strands, not punching them down. Re-cover and let rest another 30 minutes.
- Shape into loavesTurn the dough onto a well-floured surface and cut in half. Flip each piece cut-side up and dust with flour. Gently press into a 12x6-inch rectangle, then fold the short ends toward the center with a slight overlap — you'll end up with a 7x4-inch rectangle. Cut two pieces of parchment to 12x6 inches and flour generously. Transfer each loaf to parchment, seam-side down, and dust the tops with flour. Cover loosely with plastic wrap and let rest at room temperature for 45 minutes to 1 hour. The dough should look puffy and relaxed.
- BakePosition an oven rack in the lower-middle position, place a pizza stone on it, and preheat the oven to 450 degrees F. Let it preheat for at least 30 minutes — the stone needs to be fully saturated with heat. Just before baking, set a baking sheet filled with hot water on the rack below the stone (this steam keeps the crust extensible in the first few minutes, letting the loaf spring up before it sets). Using a pizza peel or inverted baking sheet, gently stretch each loaf to about 10x6 inches by poking the surface with your fingers, then slide onto the hot stone. Bake 22-27 minutes until the crust is deep golden brown and the internal temperature hits 210 degrees F. Cool on a wire rack for at least 1 hour before cutting — cutting too early collapses the crumb structure you just spent all day building.