Cinnamon Raisin Swirl Bread (and How to Beat the Dreaded Swirl Gap)
Sign in to see ingredients
Create a free account to unlock this content
Don't have an account? Sign up free
Per serving
Calculating nutrition...
- 1
Wake up the yeast
In a large bowl, dissolve the yeast in 1/4 cup warm water (110-115 degrees F). That temperature window matters: too cold and the yeast stays sluggish, too hot (much past 120 degrees) and you start killing the little guys. Give it about 5 minutes. When it looks foamy and smells faintly of beer, your yeast is alive and hungry and ready to eat sugar.
- 2
Mix the dough
Add the warm milk, 1/3 cup of the sugar, the canola oil, salt, and 2 cups of the flour. Beat until smooth. This early beating is secretly the beginning of gluten development. Stir in the raisins, then add just enough of the remaining flour to form a soft dough. Add flour gradually here: you want the dough soft and slightly tacky, because a wetter dough gives a lighter, more open crumb. Dry, stiff dough bakes up tight and dense.
- 3
Knead to the window
Turn the dough onto a floured surface and knead 6-8 minutes until smooth and elastic. What you are actually doing is lining up the gluten proteins (glutenin and gliadin) into a stretchy net that traps the gas the yeast produces. Test it: pull off a walnut-size piece and stretch it thin. If you can stretch it to a translucent membrane without tearing (the classic windowpane test), the gluten is developed. It should feel tacky but not stick to your hands.
- 4
First rise
Place the dough in a greased bowl, turning once to coat the top (that thin film of oil keeps the surface from drying into a skin). Cover and let rise in a warm spot until doubled, about 1-1/4 hours. During this bulk ferment the yeast is exhaling carbon dioxide into that gluten net and also building flavor compounds. Poke it: if the dent springs back slowly and stays partly dented, it is ready.
- 5
Shape the swirl (the gap-proofing step)
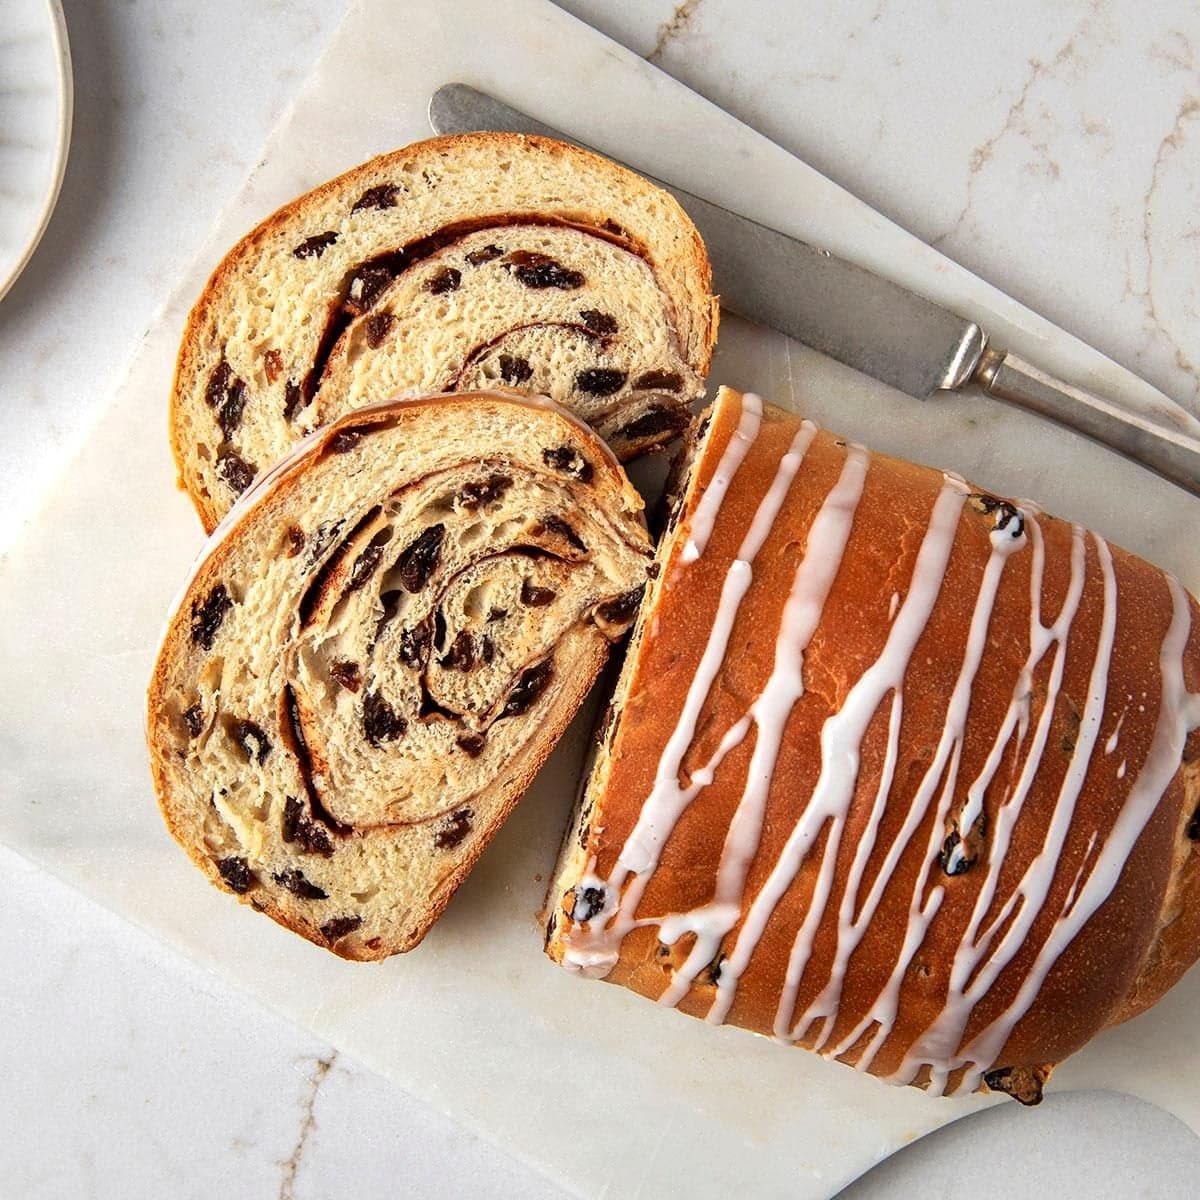
Punch the dough down and divide in half. Roll each half into a 15x7-inch rectangle. Combine the cinnamon with the remaining 1/2 cup sugar and sprinkle it evenly over the dough, then lightly sprinkle the surface with about 1 tablespoon of water. Here is the nerdy secret to no swirl gap: dry cinnamon sugar melts into a slippery caramel layer during baking and lets the coils slide apart, leaving that annoying tunnel. A light mist of water helps the layers glue together and keeps the sugar from turning into a slick barrier. Starting from a short side, roll it up tightly jelly-roll style, keeping firm tension so no air pockets hide between the coils. Pinch the seam and the ends to seal, and set each loaf seam side down in a greased 9x5-inch pan.
- 6
Second rise
Cover the pans and let the loaves rise until doubled, about 1 hour. Do not rush this proof: under-proofed dough tears itself apart in the oven, while a properly proofed loaf domes gently just above the pan rim and jiggles like it means it.
- 7
Bake
Preheat the oven to 350 degrees F and bake 30-35 minutes until deep golden brown. The color comes from the Maillard reaction and a little caramelization of that cinnamon sugar. For certainty, an instant-read thermometer in the center should read about 190-200 degrees F, which tells you the starches have gelatinized and the crumb is set. Turn the loaves out of the pans onto wire racks so steam escapes instead of steaming the crust soft, and let them cool completely.
- 8
Glaze
Whisk the confectioners' sugar with 1 tablespoon milk until smooth, then drizzle over the warm loaves. Confectioners' sugar has a little cornstarch in it, which is why this glaze sets to a soft matte finish instead of staying wet and runny like one made with granulated sugar.
Sign in to see all instructions
Create a free account to unlock this content
Don't have an account? Sign up free
Cinnamon Raisin Swirl Bread (and How to Beat the Dreaded Swirl Gap)
Created by: TheBreadNerd
Ingredients
- 1/4 oz active dry yeast
- 1/4 cup water
- 2 cup milk
- 5/6 cup sugar
- 1/4 cup canola oil
- 2 tsp salt
- 6 cup all-purpose flour
- 2 cup raisins
- 1 tbsp ground cinnamon
- 1/2 cup confectioners' sugar
Instructions
- Wake up the yeastIn a large bowl, dissolve the yeast in 1/4 cup warm water (110-115 degrees F). That temperature window matters: too cold and the yeast stays sluggish, too hot (much past 120 degrees) and you start killing the little guys. Give it about 5 minutes. When it looks foamy and smells faintly of beer, your yeast is alive and hungry and ready to eat sugar.
- Mix the doughAdd the warm milk, 1/3 cup of the sugar, the canola oil, salt, and 2 cups of the flour. Beat until smooth. This early beating is secretly the beginning of gluten development. Stir in the raisins, then add just enough of the remaining flour to form a soft dough. Add flour gradually here: you want the dough soft and slightly tacky, because a wetter dough gives a lighter, more open crumb. Dry, stiff dough bakes up tight and dense.
- Knead to the windowTurn the dough onto a floured surface and knead 6-8 minutes until smooth and elastic. What you are actually doing is lining up the gluten proteins (glutenin and gliadin) into a stretchy net that traps the gas the yeast produces. Test it: pull off a walnut-size piece and stretch it thin. If you can stretch it to a translucent membrane without tearing (the classic windowpane test), the gluten is developed. It should feel tacky but not stick to your hands.
- First risePlace the dough in a greased bowl, turning once to coat the top (that thin film of oil keeps the surface from drying into a skin). Cover and let rise in a warm spot until doubled, about 1-1/4 hours. During this bulk ferment the yeast is exhaling carbon dioxide into that gluten net and also building flavor compounds. Poke it: if the dent springs back slowly and stays partly dented, it is ready.
- Shape the swirl (the gap-proofing step)Punch the dough down and divide in half. Roll each half into a 15x7-inch rectangle. Combine the cinnamon with the remaining 1/2 cup sugar and sprinkle it evenly over the dough, then lightly sprinkle the surface with about 1 tablespoon of water. Here is the nerdy secret to no swirl gap: dry cinnamon sugar melts into a slippery caramel layer during baking and lets the coils slide apart, leaving that annoying tunnel. A light mist of water helps the layers glue together and keeps the sugar from turning into a slick barrier. Starting from a short side, roll it up tightly jelly-roll style, keeping firm tension so no air pockets hide between the coils. Pinch the seam and the ends to seal, and set each loaf seam side down in a greased 9x5-inch pan.
- Second riseCover the pans and let the loaves rise until doubled, about 1 hour. Do not rush this proof: under-proofed dough tears itself apart in the oven, while a properly proofed loaf domes gently just above the pan rim and jiggles like it means it.
- BakePreheat the oven to 350 degrees F and bake 30-35 minutes until deep golden brown. The color comes from the Maillard reaction and a little caramelization of that cinnamon sugar. For certainty, an instant-read thermometer in the center should read about 190-200 degrees F, which tells you the starches have gelatinized and the crumb is set. Turn the loaves out of the pans onto wire racks so steam escapes instead of steaming the crust soft, and let them cool completely.
- GlazeWhisk the confectioners' sugar with 1 tablespoon milk until smooth, then drizzle over the warm loaves. Confectioners' sugar has a little cornstarch in it, which is why this glaze sets to a soft matte finish instead of staying wet and runny like one made with granulated sugar.