Classic Sourdough Boule (and Why Wild Yeast Makes a Better Loaf)
Sign in to see ingredients
Create a free account to unlock this content
Don't have an account? Sign up free
Per serving
Calculating nutrition...
- 1
Feed the starter and wait for the peak
Feed your sourdough starter 4 to 12 hours before you plan to mix, and let it get bubbly and roughly double. Here's why timing matters: your starter is a living colony of wild yeast (the leavening) and lactic acid bacteria (the tang). It's most powerful right at its peak, when the yeast population is largest and hungriest, so that's when you want to catch it. Quick test: drop a spoonful into a glass of water. If it floats, it's full of gas and ready to raise a loaf. If it sinks, give it another hour.
- 2
Mix a shaggy dough
In a large bowl, stir together 1 cup active starter, 1 1/4 cups lukewarm water, and 2 teaspoons salt, then add 4 cups flour and mix until there's no dry flour left. It'll look rough and lumpy, and that's exactly right. At this stage you're only hydrating the flour, not building structure yet. Cover and let it rest 30 minutes. During that rest the flour fully drinks up the water and gluten strands quietly start linking together on their own, which means less work for you later.
- 3
Build strength with stretch and folds
Instead of kneading, do 4 sets of stretch-and-folds spaced 30 minutes apart. With a wet hand, grab one edge of the dough, stretch it up, and fold it over to the center, then rotate the bowl a quarter turn and repeat all the way around. Wet hands keep it from sticking. This is gentle gluten development: you're aligning the protein strands into an organized web rather than beating them into submission, and each fold traps gas and adds tension. Watch it transform from shaggy and slack to smooth, elastic, and jiggly over the sets.
- 4
Bulk ferment until doubled
Cover the bowl and let the dough ferment 8 to 24 hours at room temperature, until it's roughly doubled, domed, and dotted with bubbles. This long rise is where both the flavor and the lift come from. The wild yeast is pumping out carbon dioxide to inflate the dough, while the bacteria produce lactic and acetic acid, which is that signature sourdough tang. Watch the dough, not the clock: a warm kitchen can finish in 8 hours, a cool one might need the full 24.
- 5
Shape a tight boule
Turn the dough onto a lightly floured counter. Fold the edges into the center to make a rough ball, flip it seam-side down, then cup your hands around it and drag it toward you a few times across the counter. That dragging tightens the outer skin, and surface tension is the whole game here: a taut skin holds the gas in and pushes the loaf up and out rather than letting it spread into a sad flat disc. Set it seam-side up in a floured banneton or a bowl lined with a floured towel.
- 6
Cold proof overnight
Cover the shaped loaf and proof it in the fridge for 12 to 15 hours (or 2 to 4 hours at room temperature if you're in a hurry). The cold slows fermentation way down, so the flavor keeps developing without the dough over-proofing and going slack. Bonus: cold, firm dough is far easier to score cleanly. It won't look dramatically bigger, but it will spring in the oven, so trust it.
- 7
Preheat the Dutch oven screaming hot
About an hour before baking, put a covered Dutch oven into the oven and preheat to 500F. Give it the full hour so the pot is thoroughly heat-soaked. A preheated Dutch oven works like a tiny brick oven: it slams the dough with fierce, even heat, and the lid traps the steam coming off the dough itself. That steam is critical because it keeps the crust soft and stretchy for the first few minutes, which lets the loaf balloon to its full size (bakers call it oven spring) before the crust sets.
- 8
Score, then bake
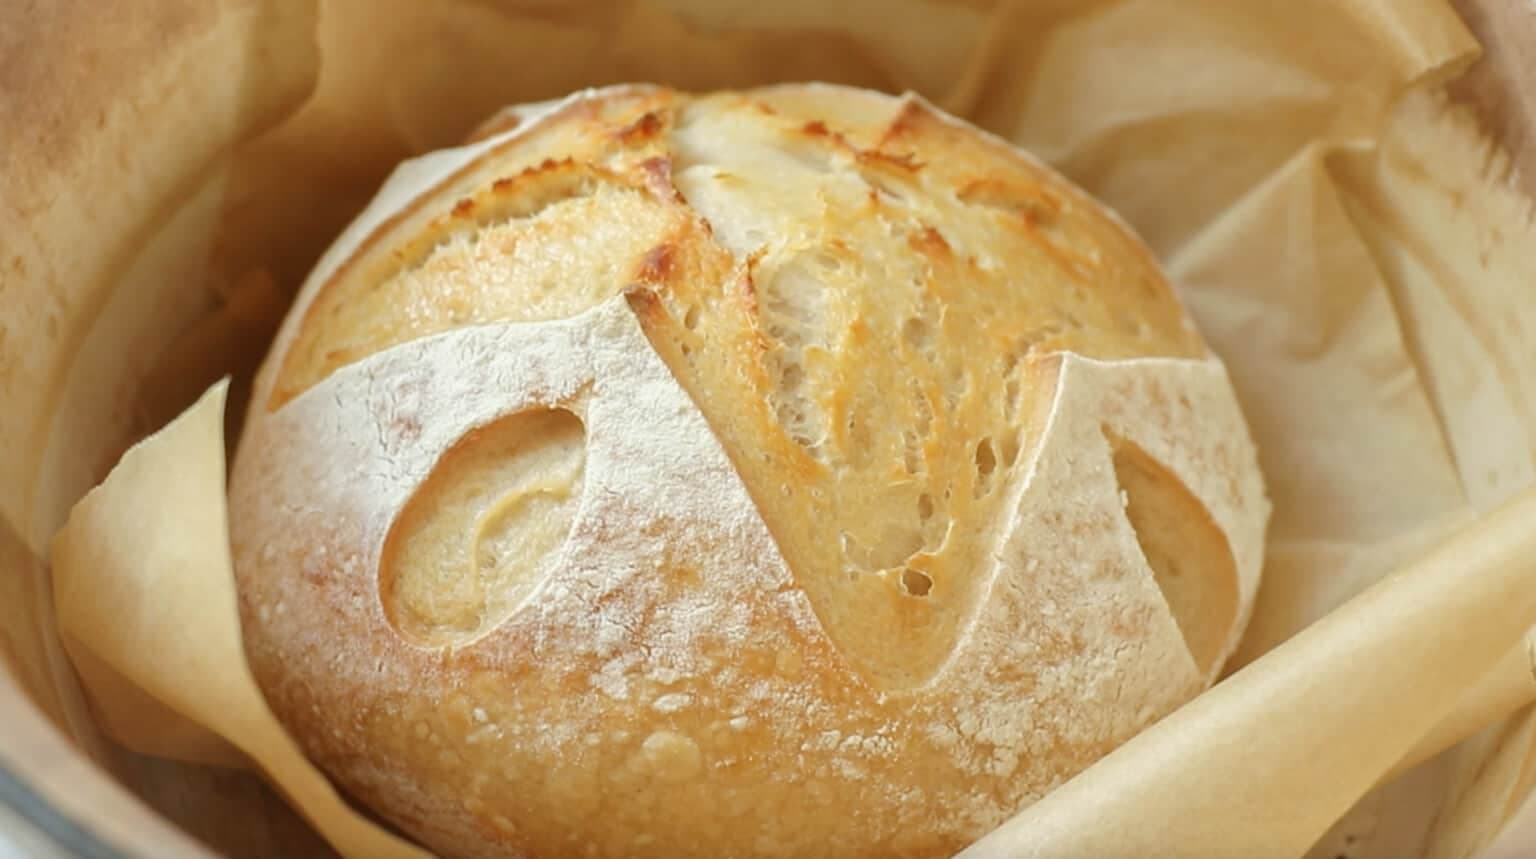
Turn the cold dough out onto a sheet of parchment, dust the top with a little flour, and make one confident slash about 1/2 inch deep with a razor blade, lame, or very sharp knife. The score is a deliberate weak point: it gives the expanding loaf a place to burst open (that gorgeous raised 'ear') instead of tearing randomly along the side. Lower it, parchment and all, into the hot pot, cover, and bake 20 minutes at 500F. Then uncover, drop the heat to 450F, and bake 20 minutes more until the crust is deep golden brown and sounds hollow when you tap the bottom (internal temp around 205 to 210F). Cool completely before slicing, because it's literally still baking inside as it cools.
Sign in to see all instructions
Create a free account to unlock this content
Don't have an account? Sign up free
Classic Sourdough Boule (and Why Wild Yeast Makes a Better Loaf)
Created by: TheBreadNerd
Ingredients
- 1 cup sourdough starter
- 1 1/4 cup water
- 2 tsp salt
- 4 cup all-purpose flour
Instructions
- Feed the starter and wait for the peakFeed your sourdough starter 4 to 12 hours before you plan to mix, and let it get bubbly and roughly double. Here's why timing matters: your starter is a living colony of wild yeast (the leavening) and lactic acid bacteria (the tang). It's most powerful right at its peak, when the yeast population is largest and hungriest, so that's when you want to catch it. Quick test: drop a spoonful into a glass of water. If it floats, it's full of gas and ready to raise a loaf. If it sinks, give it another hour.
- Mix a shaggy doughIn a large bowl, stir together 1 cup active starter, 1 1/4 cups lukewarm water, and 2 teaspoons salt, then add 4 cups flour and mix until there's no dry flour left. It'll look rough and lumpy, and that's exactly right. At this stage you're only hydrating the flour, not building structure yet. Cover and let it rest 30 minutes. During that rest the flour fully drinks up the water and gluten strands quietly start linking together on their own, which means less work for you later.
- Build strength with stretch and foldsInstead of kneading, do 4 sets of stretch-and-folds spaced 30 minutes apart. With a wet hand, grab one edge of the dough, stretch it up, and fold it over to the center, then rotate the bowl a quarter turn and repeat all the way around. Wet hands keep it from sticking. This is gentle gluten development: you're aligning the protein strands into an organized web rather than beating them into submission, and each fold traps gas and adds tension. Watch it transform from shaggy and slack to smooth, elastic, and jiggly over the sets.
- Bulk ferment until doubledCover the bowl and let the dough ferment 8 to 24 hours at room temperature, until it's roughly doubled, domed, and dotted with bubbles. This long rise is where both the flavor and the lift come from. The wild yeast is pumping out carbon dioxide to inflate the dough, while the bacteria produce lactic and acetic acid, which is that signature sourdough tang. Watch the dough, not the clock: a warm kitchen can finish in 8 hours, a cool one might need the full 24.
- Shape a tight bouleTurn the dough onto a lightly floured counter. Fold the edges into the center to make a rough ball, flip it seam-side down, then cup your hands around it and drag it toward you a few times across the counter. That dragging tightens the outer skin, and surface tension is the whole game here: a taut skin holds the gas in and pushes the loaf up and out rather than letting it spread into a sad flat disc. Set it seam-side up in a floured banneton or a bowl lined with a floured towel.
- Cold proof overnightCover the shaped loaf and proof it in the fridge for 12 to 15 hours (or 2 to 4 hours at room temperature if you're in a hurry). The cold slows fermentation way down, so the flavor keeps developing without the dough over-proofing and going slack. Bonus: cold, firm dough is far easier to score cleanly. It won't look dramatically bigger, but it will spring in the oven, so trust it.
- Preheat the Dutch oven screaming hotAbout an hour before baking, put a covered Dutch oven into the oven and preheat to 500F. Give it the full hour so the pot is thoroughly heat-soaked. A preheated Dutch oven works like a tiny brick oven: it slams the dough with fierce, even heat, and the lid traps the steam coming off the dough itself. That steam is critical because it keeps the crust soft and stretchy for the first few minutes, which lets the loaf balloon to its full size (bakers call it oven spring) before the crust sets.
- Score, then bakeTurn the cold dough out onto a sheet of parchment, dust the top with a little flour, and make one confident slash about 1/2 inch deep with a razor blade, lame, or very sharp knife. The score is a deliberate weak point: it gives the expanding loaf a place to burst open (that gorgeous raised 'ear') instead of tearing randomly along the side. Lower it, parchment and all, into the hot pot, cover, and bake 20 minutes at 500F. Then uncover, drop the heat to 450F, and bake 20 minutes more until the crust is deep golden brown and sounds hollow when you tap the bottom (internal temp around 205 to 210F). Cool completely before slicing, because it's literally still baking inside as it cools.