Pan de Muerto (and Why All That Butter, Sugar, and Egg Makes the Dough Rise So Slowly)
Sign in to see ingredients
Create a free account to unlock this content
Don't have an account? Sign up free
Per serving
Calculating nutrition...
- 1
Warm the fat, gently
Melt the butter with the milk and water in a small saucepan over low heat until the butter just melts. Do not let it simmer. You want it warm to the touch, around 110F, never hot. Here is why that number matters: warm liquid wakes the yeast up fast, but anything much above 130F starts killing it, and this is already a slow-rising dough, so you do not want to handicap the yeast before it even starts.
- 2
Build the flavor base
In a large bowl, whisk together about 1/2 cup of the flour, the yeast, salt, anise seed, and 1/2 cup of the sugar (reserve the other 1/2 cup for the glaze). Beat in the warm milk mixture, the orange extract, and 1 tablespoon of the orange zest until smooth, then beat in the eggs one at a time. The anise and orange go in now on purpose: those aromatics are fat-soluble, so with all the butter and egg yolk in this dough they ride through the whole crumb instead of just perfuming the surface.
- 3
Add flour by feel
Stir in the remaining flour about a cup at a time until you have a soft, shaggy dough that pulls away from the bowl. You may not need the full 5 cups. The dough should feel tacky but not sticky, like a slightly tacky note that lets go of your fingers. Add flour by feel rather than trusting the exact number, because egg size and kitchen humidity change how much liquid the dough can drink.
- 4
Knead to build gluten
Turn out onto a lightly floured surface and knead a full 10 minutes until smooth and elastic. It feels heavy and slow compared to a lean bread dough, and that is the butter and sugar talking: fat coats the gluten strands and sugar competes for water, so the gluten network takes longer to link up. It is ready when you can stretch a small piece thin enough to see light through it, the windowpane test.
- 5
First rise
Shape into a ball, set in a greased bowl, cover, and let rise in a warm spot until doubled, about 1 to 1 1/2 hours. If it feels slower than a normal loaf, that is expected: all that sugar pulls water away from the yeast and the fat muffles the gas bubbles, so enriched doughs always proof more slowly. Go by the doubling, not the clock.
- 6
Shape the loaves and the bones
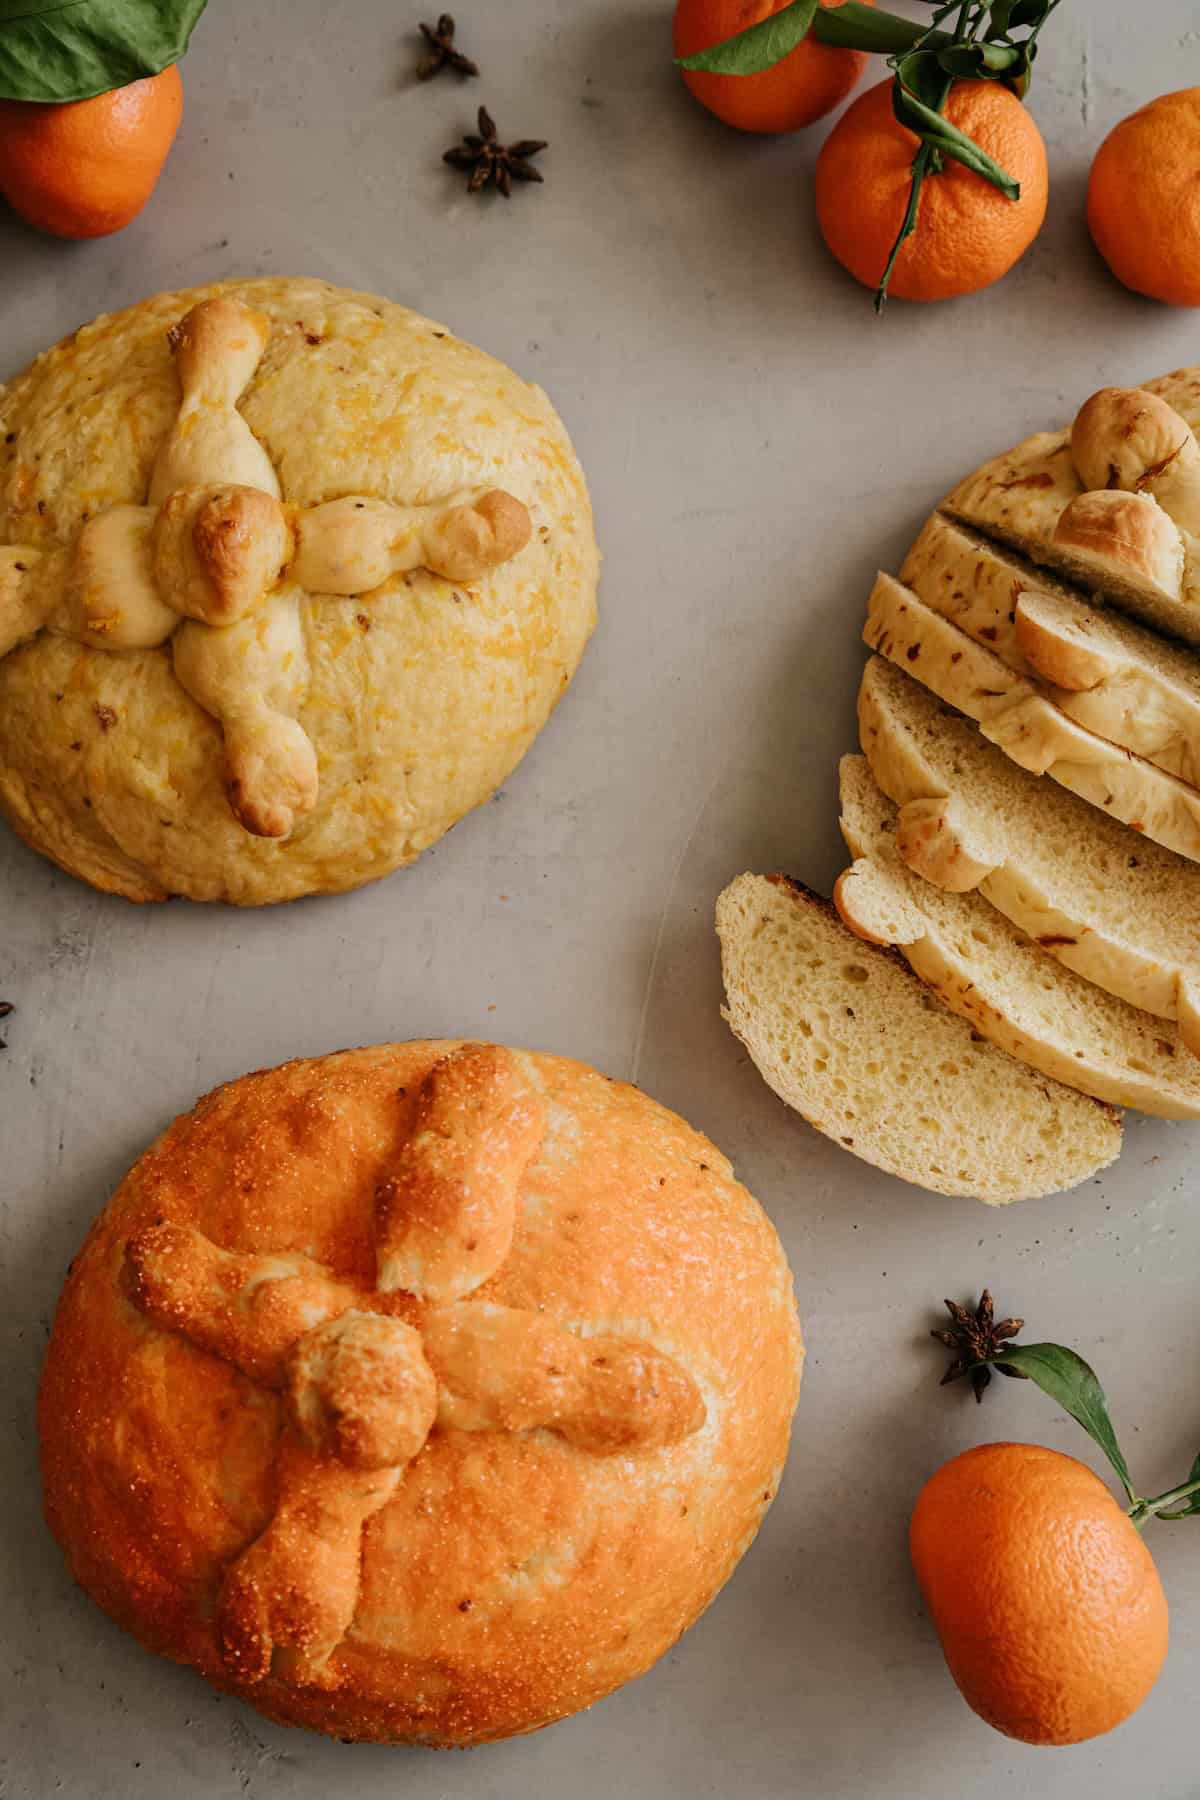
Punch down and divide into 4 pieces. Shape 3 into smooth round loaves on a parchment-lined sheet. Chill the 4th piece for a few minutes to firm it up, then roll it into ropes, pinch little knuckles down each rope to form bones, and lay two crossed over each loaf with a small dough ball in the center. Cold dough holds these shapes far better than warm dough.
- 7
Second rise and preheat
Cover loosely and let the loaves rise again until puffy, about 45 minutes. Meanwhile heat the oven to 350F. Keep the oven moderate on purpose: this dough is loaded with sugar and egg, both of which brown fast, so a gentle heat lets the centers cook through before the outsides go too dark.
- 8
Bake to a hollow thump
Bake 25 to 30 minutes until deep golden and the loaves sound hollow when you thump the bottom. That hollow sound is your real doneness cue, better than any timer: it means the interior has set and most of the free moisture has flashed to steam and left the loaf.
- 9
Glaze while warm
While the loaves bake, simmer the reserved 1/2 cup sugar with the remaining 2 tablespoons orange zest and the orange juice until the sugar dissolves. Brush it over the loaves the moment they come out of the oven. Brushing while warm lets the glaze soak into the crust instead of beading on top. Cool before tearing in.
Sign in to see all instructions
Create a free account to unlock this content
Don't have an account? Sign up free
Pan de Muerto (and Why All That Butter, Sugar, and Egg Makes the Dough Rise So Slowly)
Created by: TheBreadNerd
Ingredients
- 1/2 cup unsalted butter
- 1/2 cup milk
- 1/2 cup water
- 5 cup all-purpose flour
- 4 1/2 tsp active dry yeast
- 1 tsp salt
- 2 tsp anise seed
- 1 cup granulated sugar
- 1 tbsp orange extract
- 3 tbsp orange zest
- 4 eggs
- 1/3 cup orange juice
Instructions
- Warm the fat, gentlyMelt the butter with the milk and water in a small saucepan over low heat until the butter just melts. Do not let it simmer. You want it warm to the touch, around 110F, never hot. Here is why that number matters: warm liquid wakes the yeast up fast, but anything much above 130F starts killing it, and this is already a slow-rising dough, so you do not want to handicap the yeast before it even starts.
- Build the flavor baseIn a large bowl, whisk together about 1/2 cup of the flour, the yeast, salt, anise seed, and 1/2 cup of the sugar (reserve the other 1/2 cup for the glaze). Beat in the warm milk mixture, the orange extract, and 1 tablespoon of the orange zest until smooth, then beat in the eggs one at a time. The anise and orange go in now on purpose: those aromatics are fat-soluble, so with all the butter and egg yolk in this dough they ride through the whole crumb instead of just perfuming the surface.
- Add flour by feelStir in the remaining flour about a cup at a time until you have a soft, shaggy dough that pulls away from the bowl. You may not need the full 5 cups. The dough should feel tacky but not sticky, like a slightly tacky note that lets go of your fingers. Add flour by feel rather than trusting the exact number, because egg size and kitchen humidity change how much liquid the dough can drink.
- Knead to build glutenTurn out onto a lightly floured surface and knead a full 10 minutes until smooth and elastic. It feels heavy and slow compared to a lean bread dough, and that is the butter and sugar talking: fat coats the gluten strands and sugar competes for water, so the gluten network takes longer to link up. It is ready when you can stretch a small piece thin enough to see light through it, the windowpane test.
- First riseShape into a ball, set in a greased bowl, cover, and let rise in a warm spot until doubled, about 1 to 1 1/2 hours. If it feels slower than a normal loaf, that is expected: all that sugar pulls water away from the yeast and the fat muffles the gas bubbles, so enriched doughs always proof more slowly. Go by the doubling, not the clock.
- Shape the loaves and the bonesPunch down and divide into 4 pieces. Shape 3 into smooth round loaves on a parchment-lined sheet. Chill the 4th piece for a few minutes to firm it up, then roll it into ropes, pinch little knuckles down each rope to form bones, and lay two crossed over each loaf with a small dough ball in the center. Cold dough holds these shapes far better than warm dough.
- Second rise and preheatCover loosely and let the loaves rise again until puffy, about 45 minutes. Meanwhile heat the oven to 350F. Keep the oven moderate on purpose: this dough is loaded with sugar and egg, both of which brown fast, so a gentle heat lets the centers cook through before the outsides go too dark.
- Bake to a hollow thumpBake 25 to 30 minutes until deep golden and the loaves sound hollow when you thump the bottom. That hollow sound is your real doneness cue, better than any timer: it means the interior has set and most of the free moisture has flashed to steam and left the loaf.
- Glaze while warmWhile the loaves bake, simmer the reserved 1/2 cup sugar with the remaining 2 tablespoons orange zest and the orange juice until the sugar dissolves. Brush it over the loaves the moment they come out of the oven. Brushing while warm lets the glaze soak into the crust instead of beading on top. Cool before tearing in.