Soft Buttery Dinner Rolls (and Why an Enriched Dough Stays So Tender)
Sign in to see ingredients
Create a free account to unlock this content
Don't have an account? Sign up free
Per serving
Calculating nutrition...
- 1
Wake up the yeast
Warm 1/2 cup water to about 100-110°F (lukewarm, not hot — hot water kills yeast). Stir in the active dry yeast and 2 teaspoons of sugar, then let it sit for 5 minutes. Yeast is a living organism, and that sugar is its first meal. If it's alive and active, it'll eat the sugar and exhale CO2, which shows up as foam on top. No foam means dead yeast — toss it and start over rather than baking 2 hours of hope into a dead dough.
- 2
Warm the milk
Warm 2 cups of milk until it's warm but not hot, about 1-2 minutes in the microwave. Warm milk (and warm everything else in this recipe) keeps the yeast metabolizing quickly instead of going dormant in a cold environment.
- 3
Build the enriched base
In a large bowl or stand mixer, combine 1/3 cup sugar, the salt, the 1/4 cup butter, and 2 cups of the flour. This dough is what bakers call 'enriched' — it has fat, sugar, egg, and dairy in it, unlike a lean crusty loaf that's just flour, water, salt, and yeast. All that fat coats the gluten strands as they form, which is exactly why dinner rolls come out soft and cake-like instead of chewy.
- 4
Bring it together
Add the warm milk, the yeast mixture, and the egg to the bowl. Mix well and let it rest for 5 minutes — this short rest gives the flour time to hydrate before you start developing gluten in earnest.
- 5
Knead in the rest of the flour
Switch to a dough hook if you're using a mixer. Add the remaining flour about a cup at a time, mixing in between, until the dough is smooth and just pulling away from the sides of the bowl — you're aiming for soft and sticky, not stiff. Then knead for 5-6 minutes. Kneading is what lines up the gluten proteins (gliadin and glutenin) into a stretchy network that traps gas. The less flour you use to get there, the looser that network stays, and the more tender your rolls turn out — so resist the urge to keep adding flour just because the dough feels tacky on your hands.
- 6
First rise
Grease a large bowl, shape the dough into a ball, and turn it so the greased side is up. Cover loosely and let it rise in a warm spot for about 1 hour, until doubled. During this rise, the yeast is fermenting sugars in the dough and releasing CO2, which gets trapped in the gluten network you just built and inflates the dough like a balloon. Warmth speeds up yeast metabolism, which is why a cold kitchen means a slow rise.
- 7
Shape the rolls
Punch down the dough and divide it into 24 equal pieces, about 2 ounces each if you want to weigh them for consistency. Shape each piece into a ball by gathering the edges and pinching them together on one side — that pinch becomes the bottom of the roll. This shaping step builds surface tension on top of each roll, which helps them rise evenly and hold a round shape instead of spreading flat.
- 8
Second rise
Arrange the shaped rolls in well-greased pans, cover with a towel, and let them rise in a warm spot for 30-45 minutes, until doubled. Toward the end of this rise, preheat your oven to 375°F. This second rise relaxes any gluten tightened up during shaping and builds the final volume the rolls will hold once the heat of the oven sets the structure.
- 9
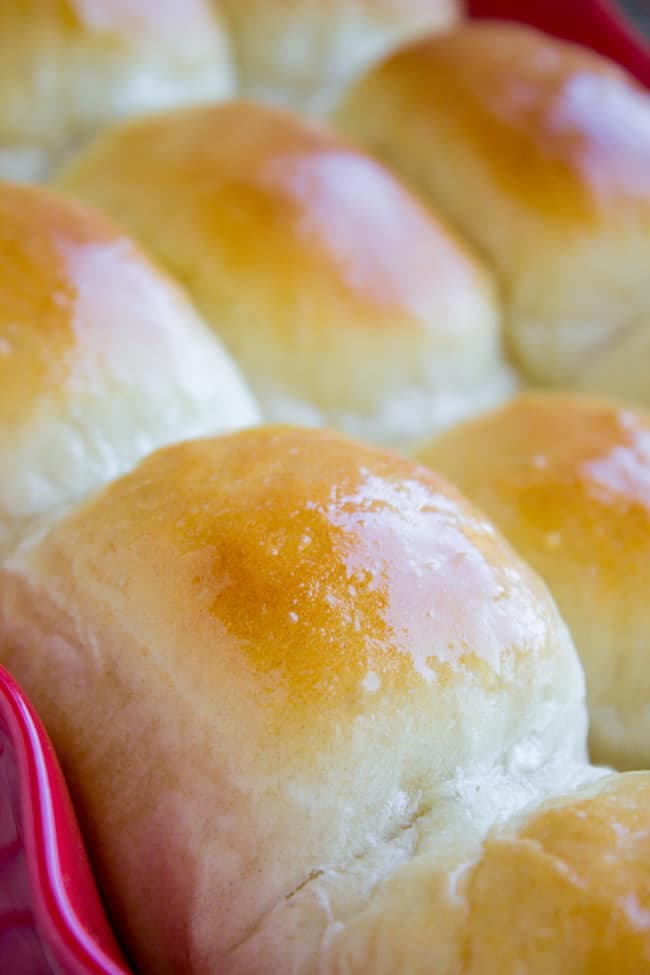
Bake and butter
Bake at 375°F for 12-15 minutes, until golden brown across the top. That golden color is the Maillard reaction — sugars and proteins on the surface browning under heat — and it's where most of the flavor lives. Pull the rolls out and immediately brush them with the remaining 4 tablespoons of melted butter; brushing it on while they're hot lets it melt straight into the surface for shine and flavor instead of just sitting on top. Eat them warm.
Sign in to see all instructions
Create a free account to unlock this content
Don't have an account? Sign up free
Soft Buttery Dinner Rolls (and Why an Enriched Dough Stays So Tender)
Created by: TheBreadNerd
Ingredients
- 1/2 cup water
- 2 tbsp active dry yeast
- 2 tsp sugar
- 2 cup milk
- 1/3 cup sugar
- 2 1/2 tsp salt
- 1/4 cup butter
- 1 egg
- 5 cup all-purpose flour
- 4 tbsp butter
Instructions
- Wake up the yeastWarm 1/2 cup water to about 100-110°F (lukewarm, not hot — hot water kills yeast). Stir in the active dry yeast and 2 teaspoons of sugar, then let it sit for 5 minutes. Yeast is a living organism, and that sugar is its first meal. If it's alive and active, it'll eat the sugar and exhale CO2, which shows up as foam on top. No foam means dead yeast — toss it and start over rather than baking 2 hours of hope into a dead dough.
- Warm the milkWarm 2 cups of milk until it's warm but not hot, about 1-2 minutes in the microwave. Warm milk (and warm everything else in this recipe) keeps the yeast metabolizing quickly instead of going dormant in a cold environment.
- Build the enriched baseIn a large bowl or stand mixer, combine 1/3 cup sugar, the salt, the 1/4 cup butter, and 2 cups of the flour. This dough is what bakers call 'enriched' — it has fat, sugar, egg, and dairy in it, unlike a lean crusty loaf that's just flour, water, salt, and yeast. All that fat coats the gluten strands as they form, which is exactly why dinner rolls come out soft and cake-like instead of chewy.
- Bring it togetherAdd the warm milk, the yeast mixture, and the egg to the bowl. Mix well and let it rest for 5 minutes — this short rest gives the flour time to hydrate before you start developing gluten in earnest.
- Knead in the rest of the flourSwitch to a dough hook if you're using a mixer. Add the remaining flour about a cup at a time, mixing in between, until the dough is smooth and just pulling away from the sides of the bowl — you're aiming for soft and sticky, not stiff. Then knead for 5-6 minutes. Kneading is what lines up the gluten proteins (gliadin and glutenin) into a stretchy network that traps gas. The less flour you use to get there, the looser that network stays, and the more tender your rolls turn out — so resist the urge to keep adding flour just because the dough feels tacky on your hands.
- First riseGrease a large bowl, shape the dough into a ball, and turn it so the greased side is up. Cover loosely and let it rise in a warm spot for about 1 hour, until doubled. During this rise, the yeast is fermenting sugars in the dough and releasing CO2, which gets trapped in the gluten network you just built and inflates the dough like a balloon. Warmth speeds up yeast metabolism, which is why a cold kitchen means a slow rise.
- Shape the rollsPunch down the dough and divide it into 24 equal pieces, about 2 ounces each if you want to weigh them for consistency. Shape each piece into a ball by gathering the edges and pinching them together on one side — that pinch becomes the bottom of the roll. This shaping step builds surface tension on top of each roll, which helps them rise evenly and hold a round shape instead of spreading flat.
- Second riseArrange the shaped rolls in well-greased pans, cover with a towel, and let them rise in a warm spot for 30-45 minutes, until doubled. Toward the end of this rise, preheat your oven to 375°F. This second rise relaxes any gluten tightened up during shaping and builds the final volume the rolls will hold once the heat of the oven sets the structure.
- Bake and butterBake at 375°F for 12-15 minutes, until golden brown across the top. That golden color is the Maillard reaction — sugars and proteins on the surface browning under heat — and it's where most of the flavor lives. Pull the rolls out and immediately brush them with the remaining 4 tablespoons of melted butter; brushing it on while they're hot lets it melt straight into the surface for shine and flavor instead of just sitting on top. Eat them warm.